
View this page as Markdown • #docs #guides #Setup #iOS #macOS #watchOS #tvOS #ObjectiveC
Objective-C Setup Guide
Let's include the TelemetryClient Swift Package in your Objective-C application and send events!
Lots of iOS and macOS application are still written in Objective-C, or a mixture of Swift and ObjC. We’ve got you covered either way, and this guide will show you how to set up the TelemetryDeck SDK in your Objective-C application.
Installing the package
The TelemetryDeck Swift package uses Swift Package Manager.
- Open Xcode and navigate to the project you want to add TelemetryDeck to.
- In the menu, select File -> Add Packages…. This will open the Swift Package Manager view.
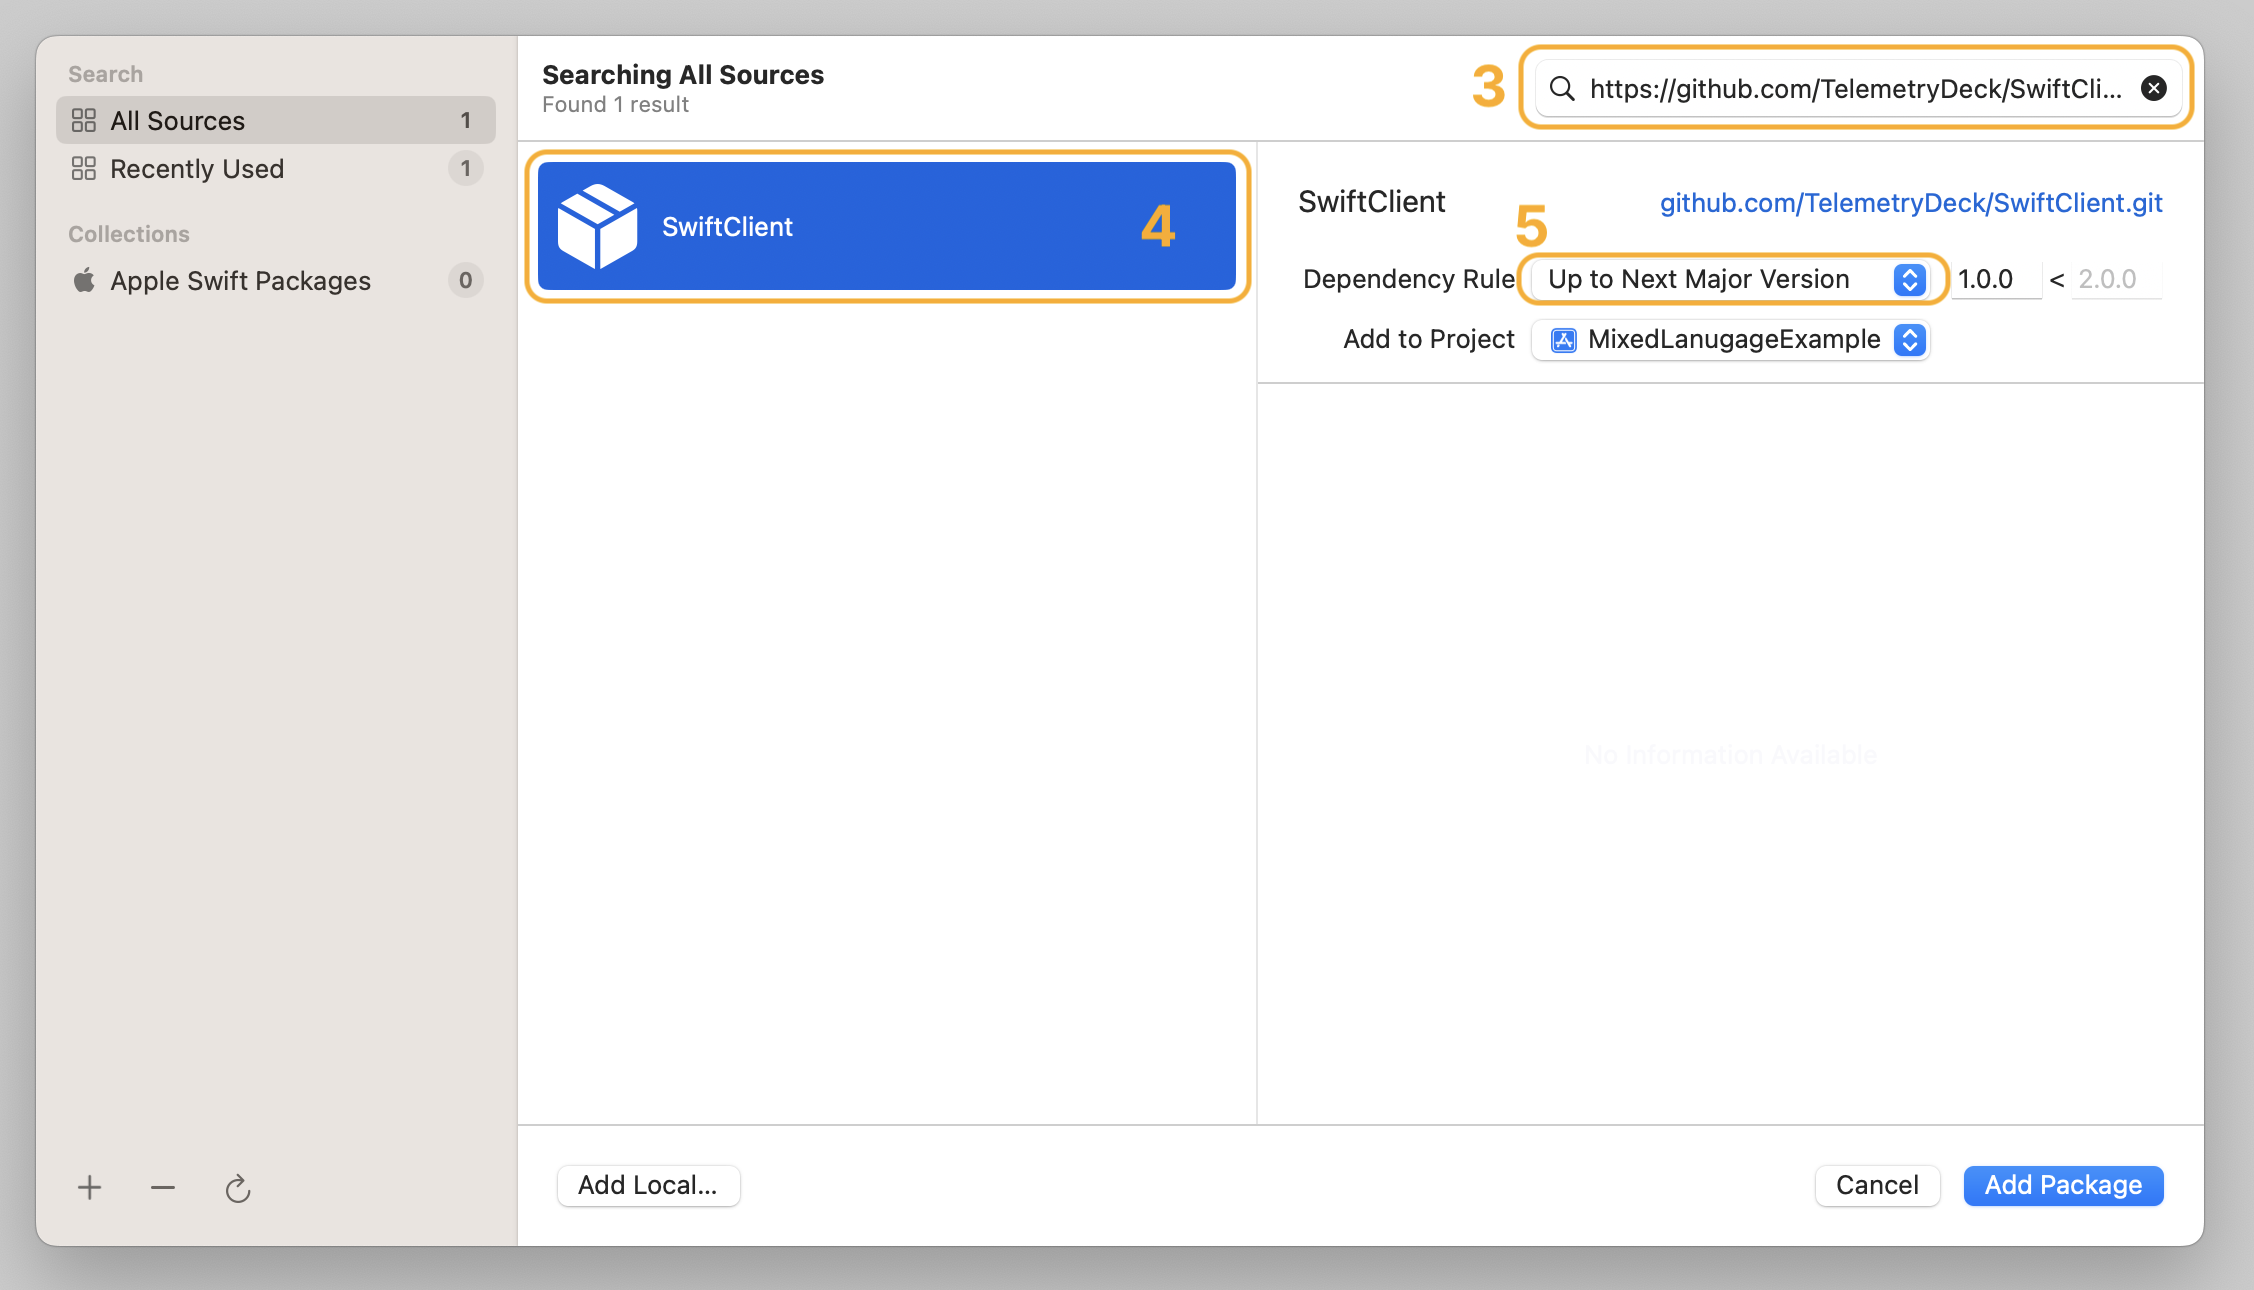
- Paste
https://github.com/TelemetryDeck/SwiftSDKinto the search field. - Select the
SwiftSDKpackage that appears in the list - Set the Dependency Rule to Up to Next Major Version.
- Click Add Package.
This will include the TelemetryDeck Swift Client into your app by downloading the source code. Feel free to browse the client’s source code. It’s tiny and you’ll see for yourself how TelemetryDeck is hashing user identifiers before they ever reach the server. Privacy, yay!
Including the package in your target
Xcode will ask you to link the package with your target in the next screen, titles Choose Package Products for SwiftSDK. Select the TelemetryClient library and click Add Package.
Initializing the TelemetryDeck package
The TelemetryClient package will provide you with a class TelemetryManager that you’ll use for all interactions with TelemetryDeck. Before you can use that class, you’ll need to initialize it at the start of your app. The ideal place for this is your App Delegate’s application:didFinishLaunchingWithOptions: method:
// Import the TelemetryClient library
@import TelemetryClient;

// ...

- (BOOL)application:(UIApplication *)application didFinishLaunchingWithOptions:(NSDictionary *)launchOptions {

    // Your other initialization code here ...

    // Initialize the TelemetryDeck client
    TelemetryManagerConfiguration *telemetryConfig =
        [[TelemetryManagerConfiguration alloc] initWithAppID:@"YOUR-APP-ID"];
    [TelemetryManager initializeWith:telemetryConfig];

    // Optional: Set a default user ID. If you don't do this,
    // the SDK will generate a random user ID for you.
    // [TelemetryManager updateDefaultUserTo:@"myuserwhojustloggedin@example.com"];

    return YES;
}Verify your setup
Run your app to verify that TelemetryDeck is properly integrated. Let’s send an event to show the app has launched correctly:
[TelemetryManager send:@"applicationDidFinishLaunching"];Open the TelemetryDeck Dashboard, navigate to “Explore > Recent Signals” and make sure “Test Mode” is enabled. You should see your signal appear after launching your app.
Enhancing your analytics (optional)
While basic session tracking provides valuable information, sending custom events lets you answer questions specific to how users engage with your app.
Sending custom events
You don’t need to keep an instance of TelemetryManager and hand it around, just call the send function on the class directly. If you want to add custom metadata payload, add it to the function call as a dictionary:
[
    TelemetryManager
    send:@"applicationDidFinishLaunching"
    with:@{@"pizzaCheeseMode": @"extraCheesy"}
];
The metadata is helpful for additional parameters for filtering or grouping signals. We’ll automatically add some metadata for you, like the app version, device model, and more.
For more information on how to send events, see the TelemetryDeck package’s README.md file.
App Store requirements
Before uploading your app to the App Store, you’ll need to complete Apple’s privacy details on App Store Connect. Although TelemetryDeck is privacy-focused, you still need to disclose analytics usage.
For guidance on completing these requirements, see our Apple App Privacy guide.
For privacy policy recommendations, check our Privacy FAQ.
What to do next
Now that you’ve integrated TelemetryDeck, learn how to use the analytics platform to gain valuable insights about your users:
📊 Analytics Walkthrough
Learn how to navigate TelemetryDeck, interpret insights, and use analytics to make data-driven decisions that improve your app and grow your user base.
Start here to get real value from your analytics →